Table of Contents
ToggleVideo transcoding is the process of converting an already-compressed video file into different formats, resolutions, or bitrates so it plays smoothly on any device or network. It works in three steps: the source is decoded to raw video, adjusted, then re-encoded into the target format ready for delivery.
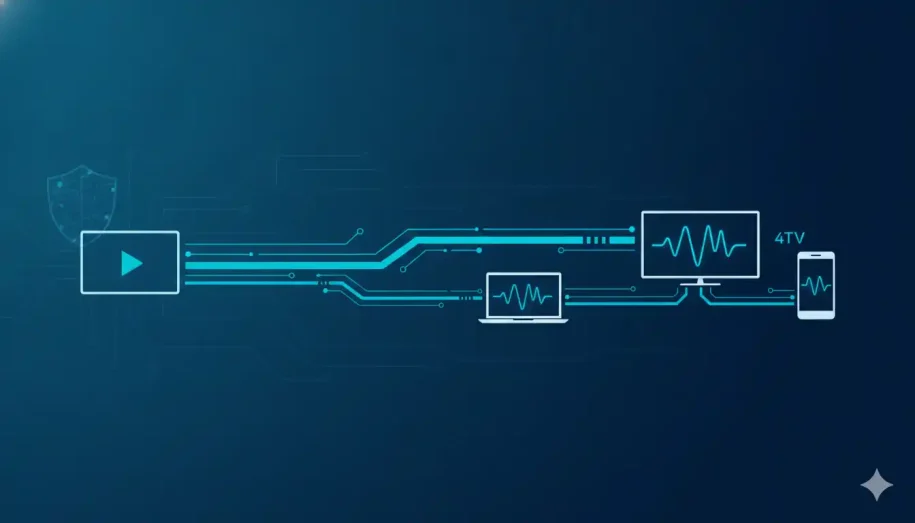
You start a video on your smart TV, pick it up on your phone during the commute, and finish it on a laptop that evening — without a single stutter. That seamless experience feels like magic, but it’s the result of a process working quietly in the background: video transcoding. It’s the same principle behind how Netflix-style encrypted delivery works.
Think of transcoding as a universal translator for your video files. A single master recording is far too large and too specific to play well everywhere, so transcoding rebuilds it into multiple optimized versions — one tuned for a shaky mobile connection, one for a 4K television, and several in between. When your video buffers, looks pixelated, or simply “won’t play on his device,” you’re feeling the absence of good transcoding. And as we’ll see, the same heavyweight file that’s hardest to deliver is also the one most worth protecting.
What Is Video Transcoding? (The Simple Definition)
Video transcoding is the act of converting a video file so that its format, resolution, codec, or bitrate matches the wide range of devices and platforms your audience uses. Different players, browsers, and networks effectively “speak different languages,” and transcoding rewrites your content so it plays cleanly on all of them.
The key idea is that transcoding turns one file into many. From a single high-quality source, a professional pipeline produces a family of renditions — smaller, lighter copies for constrained connections and crisp, high-resolution copies for big screens with bandwidth to spare. That flexibility is what lets streaming platforms deliver a steady picture regardless of who’s watching or how.
Why “Convert” Is an Oversimplification
It’s tempting to picture transcoding as a simple file swap, like renaming a document. In reality, a compressed video can’t be edited or re-shaped in place. The system must first unpack it completely, make its changes, then repackage it. That decode-adjust-re-encode cycle — not a one-click conversion — is what transcoding actually is, and it’s why doing it well takes real engineering.
Transcoding vs. Encoding vs. Transmuxing (Cleared Up Once and For All)
These three terms get used interchangeably, and that confusion is the single biggest source of misunderstanding in video. Here’s the clean distinction.
Encoding — Creating the Master
Encoding is the first compression. A raw camera or screen capture is enormous and impractical to store or stream, so encoding compresses it into a manageable digital format using a codec. Encoding happens once, at the point of creation, and produces your master file.
Transcoding — Adapting for Delivery
Transcoding takes that already-encoded master and converts it again — into different codecs, bitrates, or resolutions suited to delivery. Where encoding happens once, transcoding happens as often as your content needs to reach a new device, platform, or network condition. It is the adaptation layer.
Transmuxing — Repackaging Only
Transmuxing is the lightest of the three. It changes only the container — the wrapper around the video, such as MP4 or HLS — without touching the encoded video data inside. Because nothing is re-encoded, transmuxing is fast and inexpensive, but it cannot change resolution or bitrate, and it cannot create the multiple renditions that adaptive streaming depends on.
The simplest way to remember it: encoding creates the master, transcoding adapts it for delivery, and transmuxing rewraps it without changing it.
Ready to skip the complexity? See how a professional pipeline handles all three automatically.
How Video Transcoding Works (Step by Step)
Under the hood, every transcode follows the same three-stage workflow, regardless of the formats involved.
Step 1 — Decoding the Source
The pipeline takes your encoded source file and decodes it, reversing the original compression to recover the raw, uncompressed video and audio. This restores the full picture data so it can actually be worked on — you can’t reshape a compressed stream without first opening it back up.
Step 2 — Adjusting the Video
With raw frames available, the system applies the desired changes. This is where two important operations happen: transsizing, which changes the resolution (for example, 1080p down to 720p or 480p — see the difference between SD and HD resolution), and transrating, which changes the bitrate (for example, 16 Mbps down to 5 Mbps or 1.5 Mbps). Frame rate and audio can be adjusted here too. Each adjustment targets a specific delivery scenario.
Step 3 — Re-Encoding to the Target Format
Finally, the processed video is re-encoded into the chosen output codec and wrapped in the appropriate container, producing a finished file that’s ready to stream or download. This is the most compute-intensive stage — re-encoding high-resolution video demands significant CPU or GPU power and can add noticeable latency. That cost is precisely why most teams don’t run transcoding by hand; it’s a serious infrastructure job, not a casual conversion.
Codecs and Containers — The “Languages” of Video
To understand transcoding fully, you need two building blocks: codecs and containers. They’re often confused, but they do very different jobs.
What a Codec Actually Does
A codec (a blend of “encoder” and “decoder”) is the software that compresses and decompresses video. It shrinks files by removing redundancy in one of two ways: intra-frame compression treats each frame as a standalone image, while inter-frame compression stores only what changes from one frame to the next — far more efficient for footage that stays mostly still. Compression can be lossy, discarding some data to dramatically reduce size, or lossless, preserving every pixel for archival and editing. Common video codecs include H.264, the newer and more efficient H.265 (HEVC), and modern options like AV1 and VP9.
Codec Is Not the Same as Container
The container — MP4, MKV, or WebM, for instance — is the wrapper that holds the compressed video, audio, subtitles, and metadata together. A useful analogy: the codec is the language the video is written in, while the container is the box it ships in. Two files can share the same container but use entirely different codecs, which is exactly why a video can “play” on one device and fail on another. Good transcoding manages both.
Adaptive Bitrate Streaming — Why Transcoding Powers Smooth Playback
Here’s where transcoding earns its keep. The reason you can watch flawlessly on weak hotel Wi-Fi and again in crisp 4K at home is adaptive bitrate streaming (ABR), and ABR is impossible without transcoding.
To make ABR work, a pipeline transcodes your source into a “bitrate ladder” — a set of renditions ranging from very low resolution and bitrate up to full quality. During playback, the video player constantly measures the viewer’s available bandwidth and switches up or down the ladder in real time. When a connection weakens, the player drops to a lighter rendition to keep the video moving instead of freezing. That continuous, invisible adjustment is what prevents buffering. Standards like HLS and MPEG-DASH define how these renditions are packaged and delivered, while browser specifications like Media Source Extensions let players switch streams natively.
The Role of the CDN
Renditions still have to physically reach viewers around the world. A content delivery network (CDN) caches your transcoded files on servers close to your audience, so a viewer in Tokyo and one in Toronto both pull from nearby. Pairing a smart bitrate ladder with strong CDN distribution is what delivers genuinely zero-buffering playback at global scale.
Want delivery that holds up worldwide? Inkrypt is built on CDN-backed delivery built for zero buffering.
Why Video Transcoding Matters for Creators and Publishers
Transcoding isn’t an abstract engineering detail — it directly shapes whether your audience stays or leaves, and whether your work stays yours. It’s also your first line of defense to combat video piracy.
Universal Compatibility
A single un-transcoded master will inevitably fail on some devices. Transcoding guarantees your content plays everywhere — across operating systems, browsers, and screen sizes, including the older devices that competitors often quietly ignore. Every viewer you can’t reach is revenue and reputation lost.
Quality Without the Buffering
The eternal tension in video is quality versus speed: too high, and it buffers; too low, and it looks bad. Transcoding resolves that tension by producing the right rendition for each viewer, so everyone gets the best picture their connection can actually sustain.
Storage and Bandwidth Efficiency
High-resolution masters consume enormous storage and are expensive to ship at scale. Transcoding to efficient codecs and appropriately sized renditions reduces file sizes substantially, cutting both storage and bandwidth costs without sacrificing the viewing experience.
The Security Dimension — Where Protection Comes In
Here’s the part most explanations skip entirely. The transcoding pipeline isn’t only where your video is prepared — it’s the natural place where your video is protected. As renditions are generated and packaged, that’s the exact moment to apply DRM encryption, embed dynamic watermarking, and wrap content in secure, tamper-resistant packaging. (If you’re weighing your options, here are seven things to consider when choosing the right DRM software.)
This matters because a raw or carelessly delivered file is doubly exposed: it’s heavy and it’s easy to rip. Knowing how to protect your content from being downloaded is essential. For course creators, publishers, and media teams whose content is the business, transcoding and protection aren’t separate concerns — they’re two halves of the same job. A pipeline that adapts your video for every device while leaving it unprotected has only done half the work.
Should You Transcode Yourself or Use a Platform?
You can transcode yourself. Open-source tools like FFmpeg are powerful and free. But the honest picture is that a do-it-yourself pipeline means managing codec settings, building and maintaining a bitrate ladder, provisioning serious compute, handling CDN distribution, and keeping pace with evolving formats — and that’s all before you’ve addressed security at all.
For most creators and publishers, the hidden risks of getting it wrong — degraded quality, broken playback on devices you didn’t test, ballooning costs, and most dangerously, exposed and pirateable content — outweigh the appeal of rolling your own. A managed cloud video hosting platform that handles transcoding, global delivery, and protection together removes that entire class of risk. (If you’re starting from scratch, here’s how to build a video platform like YouTube.)
Real security for real creators — start protecting your video with a free 30-day trial.
Conclusion — Transcoding Is the Invisible Engine of Great Video
Video transcoding is the bridge between the file you upload and the flawless playback your audience expects. It works by decoding your source, adjusting its resolution and bitrate, and re-encoding it into the formats every device can handle — then, through adaptive bitrate streaming and a strong CDN, delivering it smoothly anywhere in the world.
But great delivery is only half the story. The same pipeline that makes your content universally playable is also where it should be made secure. Done right, transcoding doesn’t just get your video seen — it gets it seen and protected. For anyone whose business depends on premium video, those two goals were always the same goal.
Frequently Asked Questions
Transcoding can reduce quality if it uses lossy compression to shrink file size, but it doesn’t have to. Lossless transcoding preserves every pixel of the original. A well-configured pipeline balances quality against file size, so viewers get the sharpest picture their device and connection can support.
Video usually buffers because it’s only available in one high bitrate that your connection can’t sustain. Transcoding fixes this by creating multiple lighter versions through adaptive bitrate streaming, so the player automatically drops to a smaller file when your bandwidth dips — keeping playback smooth instead of frozen.
For broad compatibility, MP4 with the H.264 codec and AAC audio plays on nearly every device. For streaming, HLS or MPEG-DASH packaging is standard. Newer codecs like H.265 (HEVC) and AV1 offer smaller files at the same quality, but check that your target devices support them.
Transcoding time depends on the video’s length, resolution, and the number of output renditions, plus available CPU or GPU power. A short clip may finish in seconds, while a long 4K file with a full bitrate ladder can take much longer. Re-encoding high-resolution video is the most demanding step.
Platforms like YouTube transcode your upload automatically, so you don’t manage it there. But if you host premium or protected content yourself — courses, paid media, or proprietary video — you need your own transcoding pipeline to control quality, compatibility, and security rather than handing your content to a public platform.
No. Compression reduces file size, while transcoding is the broader process of decoding a video and re-encoding it into a different format, codec, bitrate, or resolution. Compression often happens during transcoding, but transcoding also handles compatibility and the multiple renditions that streaming requires.
Yes. The transcoding stage is where content protection is applied — including DRM encryption, dynamic watermarking, and secure packaging. Because your video is already being decoded and re-encoded, it’s the natural point to lock it down, so adaptation and protection happen together rather than as separate steps.
Encoding is the first compression that turns raw footage into a master file, and it happens once. Transcoding converts that already-encoded file again into different formats or bitrates for delivery, and it happens as often as new devices or platforms require it.
Transmuxing changes only a video’s container — its wrapper, such as MP4 to HLS — without re-encoding the video data inside. It’s much faster and cheaper than transcoding, but it can’t change resolution, bitrate, or codec, and it can’t create adaptive streaming renditions.
Adaptive bitrate streaming (ABR) delivers video in multiple quality levels at once. The player measures the viewer’s available bandwidth in real time and switches between versions automatically, raising quality on fast connections and lowering it on slow ones to prevent buffering.
A transcoding ladder, or bitrate ladder, is the set of renditions a pipeline creates from one source — ranging from low resolution and bitrate up to full quality. These rungs give the adaptive streaming player options to switch between as network conditions change.
FFmpeg is a powerful, free open-source tool capable of professional transcoding. However, it requires technical expertise to configure codecs, build bitrate ladders, provision compute, and handle delivery and security yourself — which is why many creators choose a managed pipeline instead.
Resources & Citations
- ITU-T (International Telecommunication Union): The official standards body for the H.264/AVC and H.265/HEVC video codecs — the authoritative technical specification for how this compression works.
- Apple Developer — HTTP Live Streaming (HLS): Apple’s official documentation for the HLS protocol, the most widely used adaptive-bitrate delivery standard.
- Alliance for Open Media (AOMedia): The official organization behind the royalty-free AV1 codec, useful for comparing modern compression options.
- W3C — Media Source Extensions: The web-standards specification that lets browsers play adaptive streams natively.
This article is for general informational and educational purposes only. Codec support, streaming standards, and platform requirements change over time, so verify current technical specifications before making implementation decisions. Inkrypt Videos makes no warranty as to completeness or accuracy.